Visualize Models in TensorBoard With Weights & Biases
This article demonstrates how to visualize models in TensorBoard using Weights & Biases and gives an example using a FashionMNIST dataset.
Created on March 6|Last edited on October 4
Comment
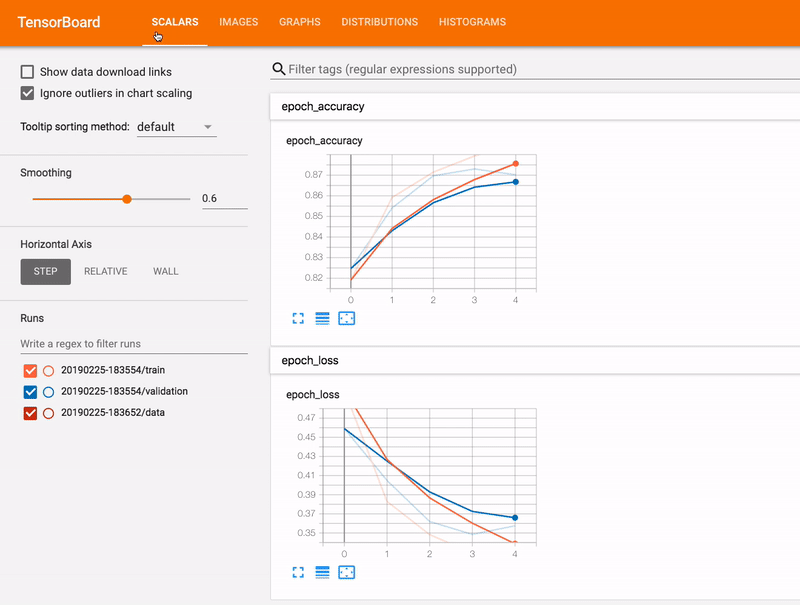
TensorBoard is a tool for visualizing machine learning models. TensorBoard enables you to log model performance metrics, parameters, and computational graphs (and much more) through a very nice web interface.
In this article, we are going to see how to spin up and host a TensorBoard instance online with Weights & Biases. We'll end with visualizing a confusion matrix in TensorBoard.
The Model
To use TensorBoard we first need a model, preferably one that is easily compatible with TensorBoard. tf.keras makes it very easier to plug TensorBoard in as a callback. We will see how in a moment. But first, let’s build a very simple model and train it to have some data to fill in our TensorBoard instance.
We can create one quickly as follows:
model = Sequential()model.add(Conv2D(16, (5, 5), activation='relu',input_shape=(28, 28, 1)))model.add(MaxPooling2D(pool_size=(2, 2)))model.add(Conv2D(32, (5, 5), activation='relu'))model.add(MaxPooling2D(pool_size=(2, 2)))model.add(Dropout(0.2))model.add(Flatten())model.add(Dense(128, activation='relu'))model.add(Dense(10, activation='softmax'))We will be using the good old FashionMNIST dataset for training this model. Below is a sneak peek of the dataset in case you have not worked with the dataset before:
The Dataset
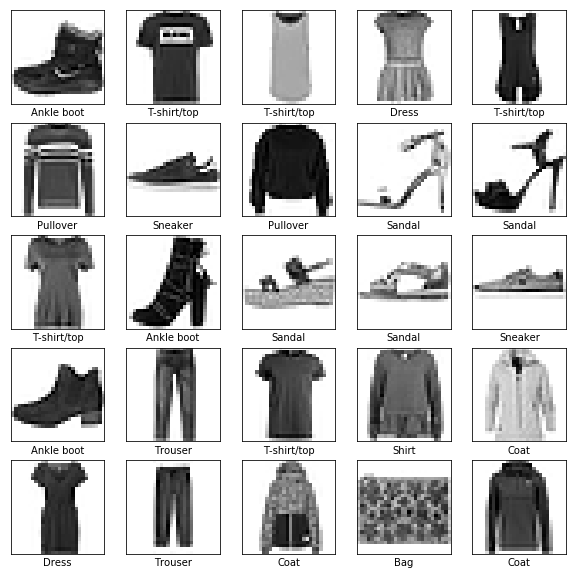
The dataset consists of images of different apparel and each image is 28x28 pixels. The images are grayscale images. This dataset comes with tf.keras.datasets. We will first be loading it and then will normalize the pixel values to the range of [0,1].
# Load and preprocess the data(X_train, y_train), (X_test, y_test) = fashion_mnist.load_data()X_train /= 255.X_test /= 255.
Now that we have set up our model and made our data ready to go into our model, let’s move on to model training.
We first need to initialize W&B with sync_tensorboard = True to sync the event files for a hosted TensorBoard environment.
wandb.init(project="your-project-name", sync_tensorboard=True)
Now, in the model training step, we simply need to pass the TensorBoard callback with an appropriate log_dir argument. In this case, that value should be wandb.run.dir.
model.fit(X_train, y_train, validation_data=(X_test, y_test), epochs=config.epochs,callbacks=[WandbCallback(data_type="image", labels=labels), TensorBoard(log_dir=wandb.run.dir)])
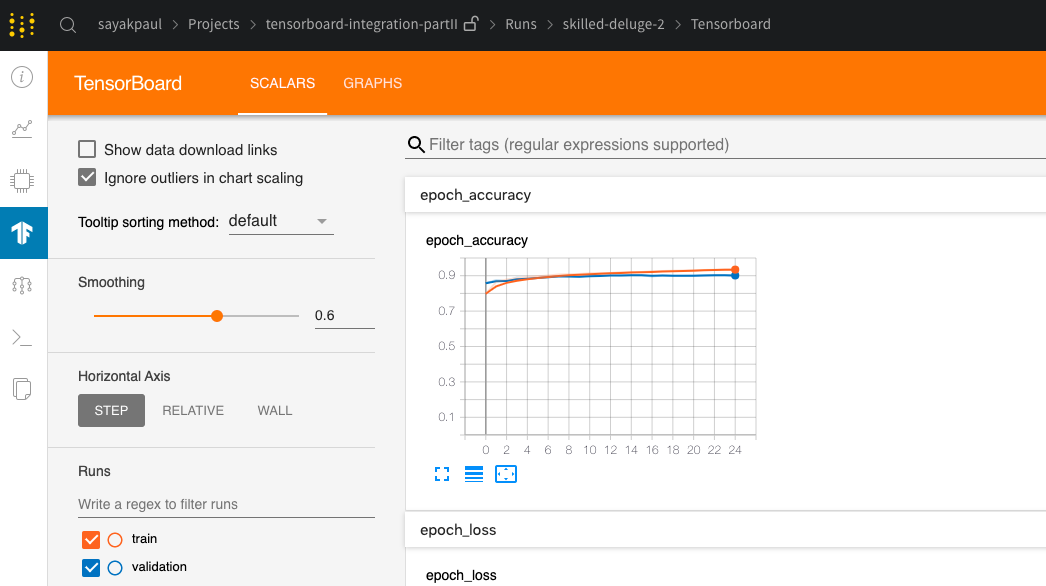
Once you run the model training step, on your W&B run page (which resembles app.wandb.ai/<username>/<project-name>/runs/<run-name>), you should see the TensorBoard.
Explore a live TensorBoard →
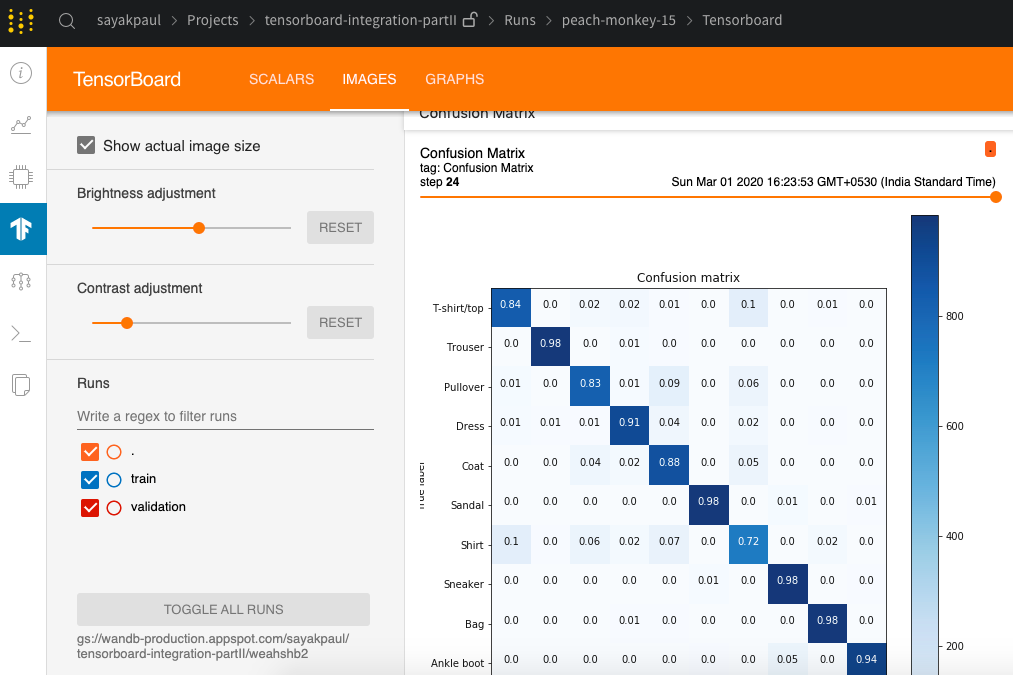
We can log a confusion matrix for our model in an epoch-wise manner in a TensorBoard instance. Confusion matrices help us in understanding the model - for instance, we can explore where the model is making incorrect predictions, and which classes it has the hardest time with. This is particularly helpful to do during the model training because it gives us an insight into whether the model is improving at its predictions through its training.
Explore a live confusion matrix →
(Click on Images to see the confusion matrix.)
That’s all for this article! I cannot wait to see your interesting model visualizations through TensorBoard and Weights & Biases.
Try TensorBoard for yourself →
Add a comment

Iterate on AI agents and models faster. Try Weights & Biases today.